Firebase authentication with react(MERN).
Abir Dutta
Published on Tuesday, Aug 22, 2023
Hey everyone, today I'm here to guide you through the simplified process of implementing authentication using Firebase. With the steps broken down, you'll find that Firebase makes authentication seamless and efficient.
Prerequisites-
Assuming you have a basic understanding of React, JavaScript, and have worked with JavaScript forms before, you're all set to get started.
Getting Started-
First, head over to Firebase,
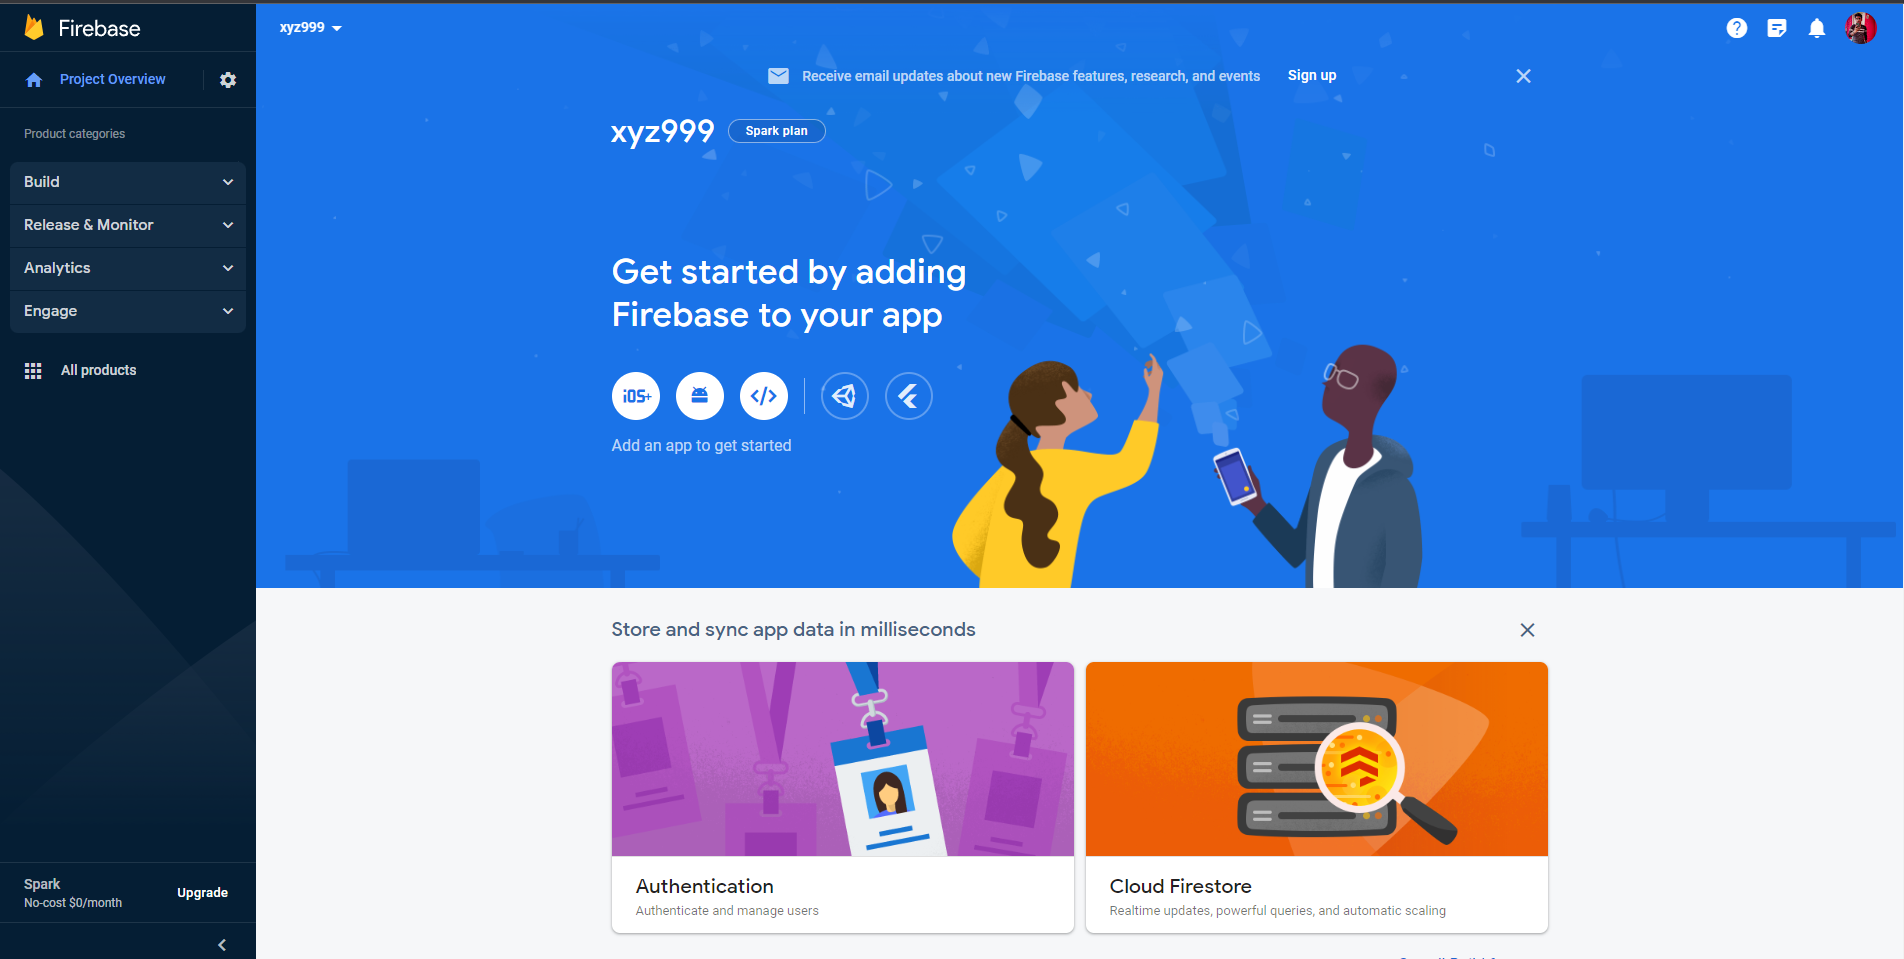
Click "GET STARTED", then "Add Project", and give it a meaningful name.
Your project dashboard should now be displayed.

Click on the "Web" button beside the Android option. Provide a nickname for your app and hit "Register App". You can skip Firebase Hosting setup for now; you can tackle that later if necessary.
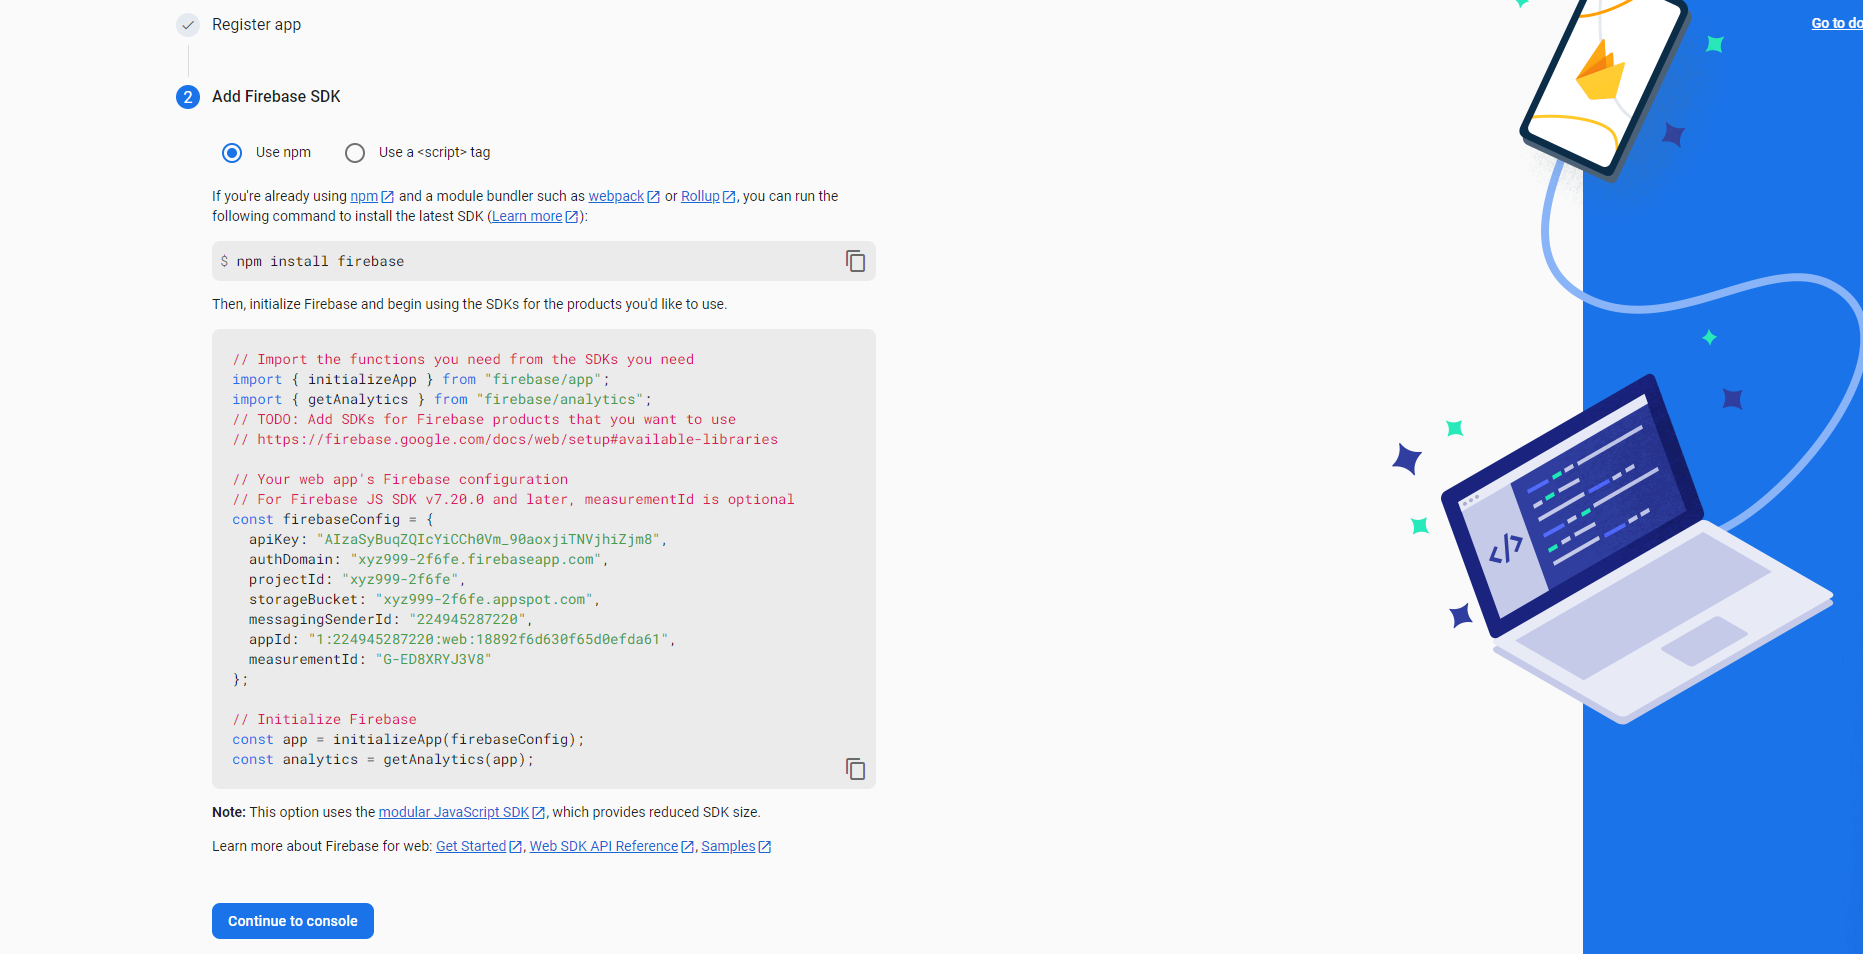
Follow the commands provided on the website:
Begin with npm install firebase.
- Create a
Firebase.jsfile in your Front-End code and paste in the credentials provided by Firebase. They should look like this:

Now, with 90% of the setup done, it's time to refine your firebase.js code:
// Import the functions you need from the SDKs you need
import { initializeApp } from "firebase/app";
import { getAuth, createUserWithEmailAndPassword } from "firebase/auth";

// TODO: Add SDKs for Firebase products that you want to use
// https://firebase.google.com/docs/web/setup#available-libraries

// Your web app's Firebase configuration
const firebaseConfig = {
  apiKey: "YOUR_API_KEY",
  authDomain: "YOUR_AUTH_DOMAIN",
  projectId: "YOUR_PROJECT_ID",
  storageBucket: "YOUR_STORAGE_BUCKET",
  messagingSenderId: "ID",
  appId: "APP_ID"
};

// Initialize Firebase
const app = initializeApp(firebaseConfig);

const auth = getAuth(app);
export { auth, app };
Congratulations! Our setup is complete. Next, we'll deep dive into writing the sign-in, sign-up, and logout functionalities.
Creating Register and Login Functionality-
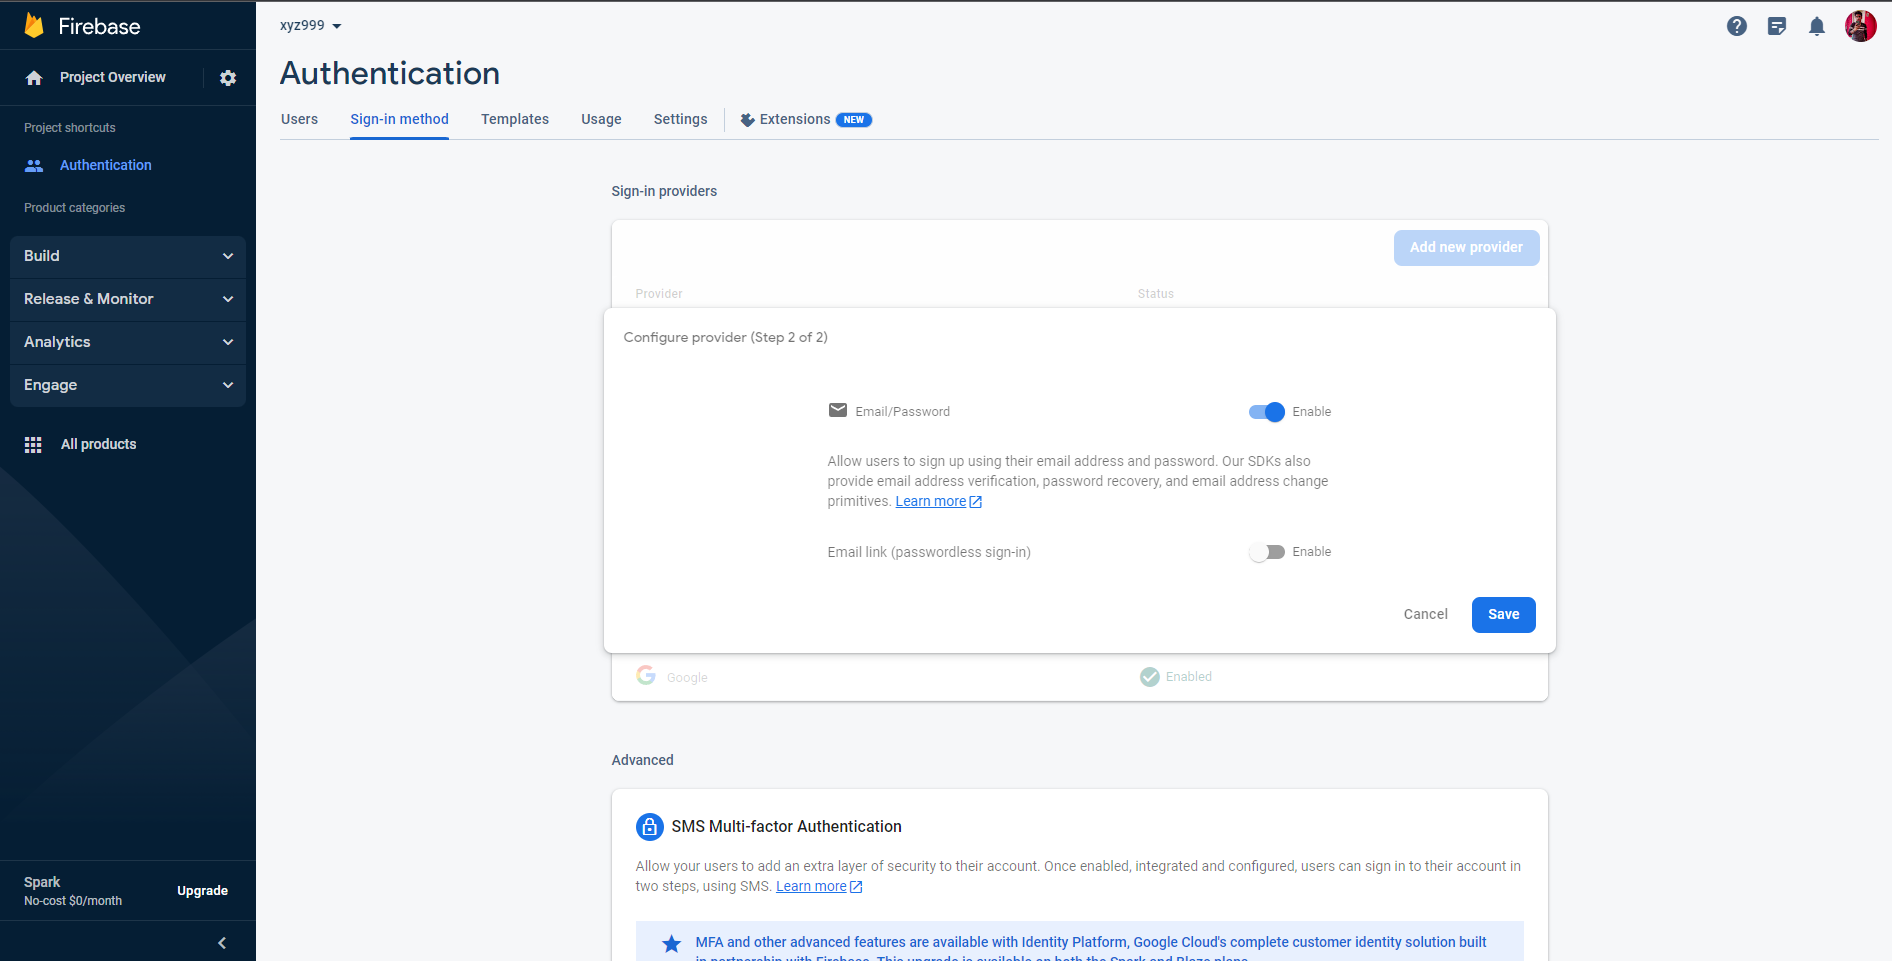
Before you start coding these functions, you need to enable the email/password option in the Firebase console:

1) For the sign-in functionality, create a button labelled "Sign In" and implement the following function:
async function signin() {
    try {

        const userCredential = await signInWithEmailAndPassword(
          auth,
          email,
          password
        );

    } catch (e) {
      console.log(e.message);
       }

 }
Don't forget to import the following in the component you are writing this signin function-
import {  signInWithEmailAndPassword } from 'firebase/auth';
import { auth } from "YOUR_FIREBASE.JS_PATH";
Here email and password is the variable that contains the email and password that is entered via the user.
2) For sign-up, use this code:
  async function register() {

    try {
        const data = await createUserWithEmailAndPassword(auth, email, password);
    } catch (e) {

      console.log(e);

    }
  }
Import the following-
import {  createUserWithEmailAndPassword } from 'firebase/auth';
import { auth } from "YOUR_FIREBASE.JS_PATH";
Congratulations🎉 if you have completed up to this part. You now have completed the login and register functionality using Firebase.
Forgot Password functionality-
In real-world websites, the "Forgot Password" feature allows users to reset their password. Let's code this functionality using Firebase:
  async function reset() {
    try {
      await resetPassword(email);
      window.alert(
        "A password reset email has been sent, check that email and refresh this page"
      );
    } catch (e) {
      console.log(e);
    }
}
Import the following to your component-
import {sendPasswordResetEmail} from "firebase/auth";
This sends an email with a password reset link to the user, enabling them to set a new password.
Logout-
Logging out is as straightforward as this code snippet:
  async function logout() {
    try {
        const response = await signOut(auth);

    } catch (e) {
        console.log(e);
    }

}
Import the following
import { signOut } from 'firebase/auth';
import { auth } from 'YOUR_FIREBASE.JS_DIRECTORY';
Sign in Using Google-
Integrating Google sign-in functionality is highly sought-after across websites. Now, you can implement it too:
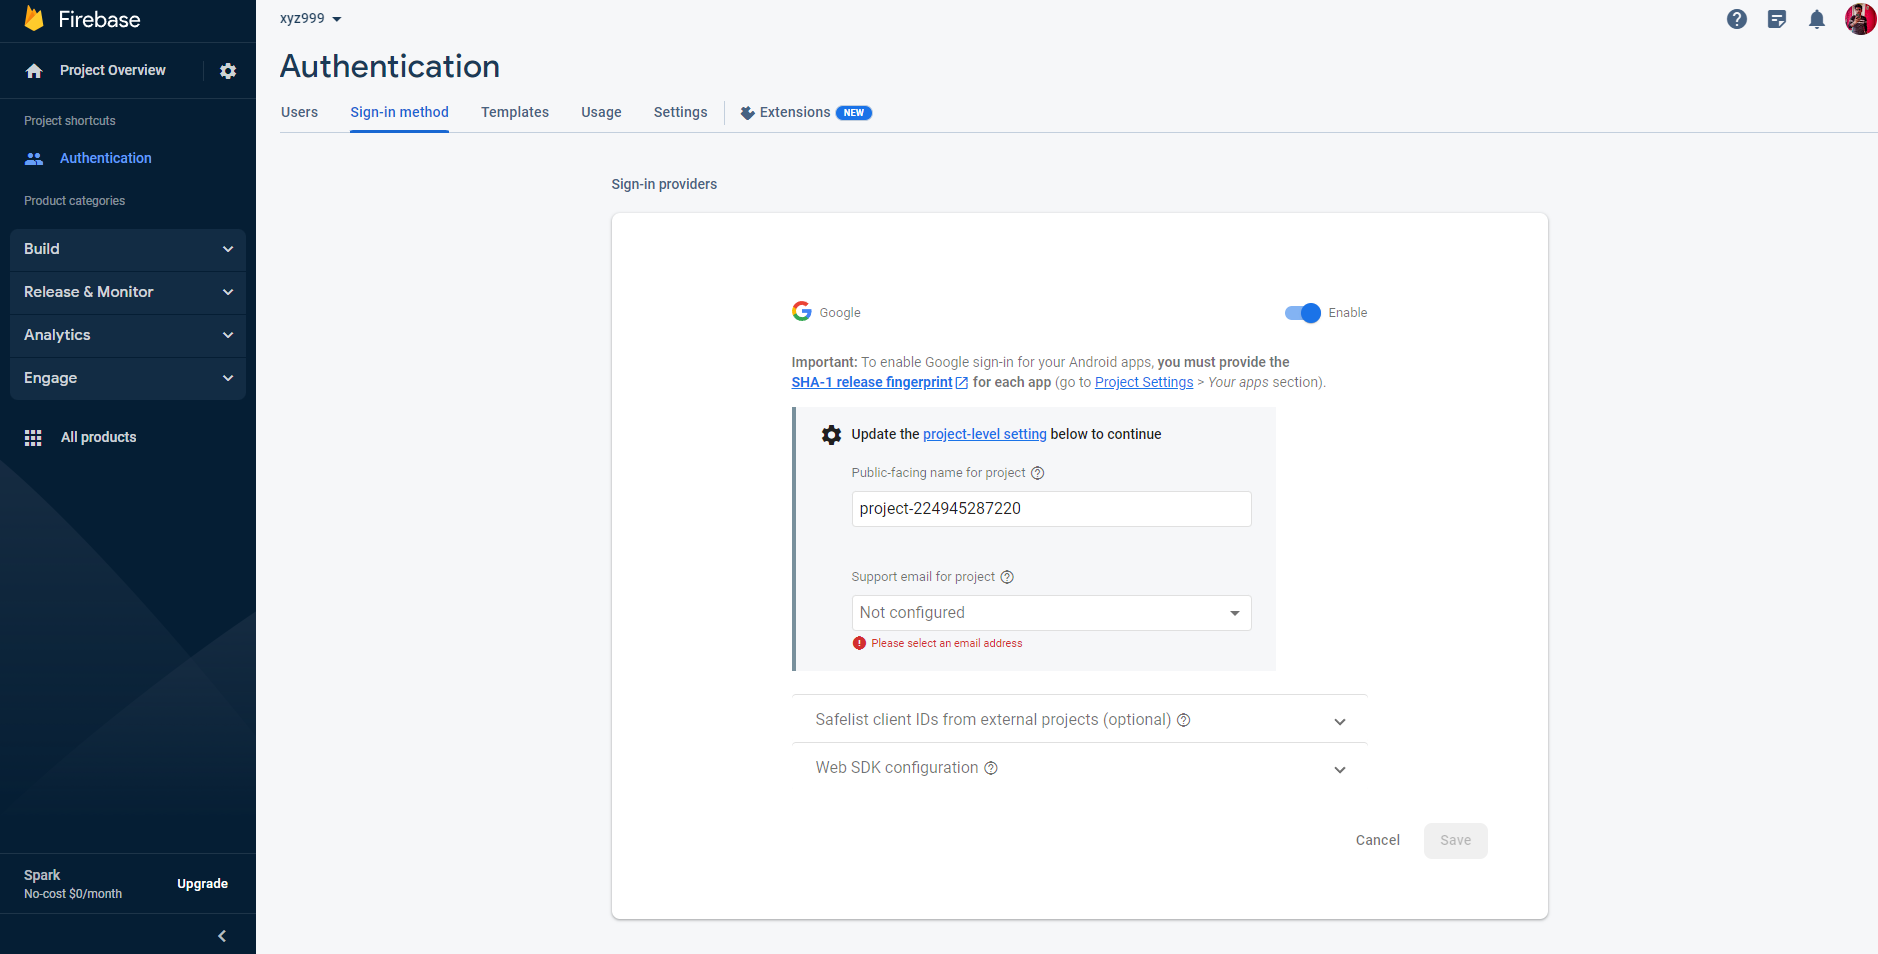
- Enable the Google option in the Authentication tab of your Firebase console and hit save.

Now here is the code for signing in via Google-
  async function google() {
    const provider = new GoogleAuthProvider();
    const userCredential = await signInWithPopup(auth, provider);
}
Import the following in your react component-
import {
  GoogleAuthProvider,
  signInWithPopup,
} from "firebase/auth";
import { auth } from 'YOUR_FIREBASE.JS_DIRECTORY';
And there you have it! With this function, you can allow users to sign in using their Google account.
State Management using Firebase-
Congratulations! You've successfully implemented the sign-in, login, and logout functionalities. But now you might be thinking about the user experience – displaying a logout button when a user is logged in and hiding it after logout, just like what you see on many real-world websites. Luckily, you can achieve this seamlessly using Firebase and the useState hook.
To get started, open your App.jsx file and add the following code snippet:
import React, { useEffect, useState } from 'react';
import { onAuthStateChanged } from 'firebase/auth';
import { auth } from 'YOUR_FIREBASE.JS_DIRECTORY';

function App() {
  const [userState, setUserState] = useState(null);

  useEffect(() => {
    const unsubscribe = onAuthStateChanged(auth, (user) => {
      if (user) {
        setUserState(user);
      } else {
        setUserState(null);
      }
    });


  }, []);

  return (
    <div>
      {/* Render your components here */}
      {userState ? <button onClick={logout}>Logout</button> : null}
    </div>
  );
}

export default App;
You can now pass the userState variable as a prop to various components in your application. With conditional rendering, you can control the visibility of buttons based on the user's authentication status.This enhances your application's usability and ensures that your users can easily navigate between authenticated and non-authenticated states.
In Summary-
With Firebase and React, you've unlocked the potential to create a seamless authentication experience for your users. From initial setup to dynamic state management, you've learned how to implement sign-in, sign-up, and logout functionalities while adapting to users' authentication status. By leveraging these technologies, you're now equipped to build secure, user-friendly web applications that prioritize both functionality and user experience.
Cheers & Happy Coding!